WMS
Online Waviness Measurement
Perfect Surface with Online Waviness Measurement
WMS 100
AMEPA online measurements of the surface area profile provide fundamental advantages for the customer:
- Visualize and document the waviness and roughness distribution over the entire length of the coil or strip
- Efficiently detect waviness values and roughness values outside the tolerance, which can be caused by
- Incoming roughness of the raw material
- Wear of work rollers
- Incorrect process parameters
- Provide online data to determine the optimum time for changing the work rolls
- Provide the Wsa roughness value and the Ra roughness value as an input for process control
- Reduce the number of offline measurements with stylus instruments
Downloads
Your contact partner
Dipl.-Wirt.Ing. Ansgar Berlekamp
Technical Sales Manager
Dipl.-Ing. Jens Harre
Technical Sales Manager
The Benefits
Precise
- Measuring range for Wsa from 0.1 to 1 µm, measuring range for Ra from 0.3 to 3 µm,
RPc 30 to 120 cm-1 - Triggering for Wsa 0.001 µm, triggering for Ra 0.01 µm
- Measurement frequency for Wsa measuring up to maximum 1 Hz
- Ra measurements with selectable cut off of 0.8 or 2.5 mm
- WMS measuring parallel to rolling direction
- View field of 1.2 х 0.4 mm, measuring line of 1200 х 3.5 µm (spatial resolution like a stylus tip)
Efficient
- Reduction of time-consuming stylus measurements on the line and in the laboratory
- Wsa measurements possible up to a strip speed of
180 m/minute - Punctual detection of waviness values, which are outside the specified tolerances, for optimal process control, short response times, increased dynamics
Versatile
- Measuring independently of light conditions
- Contactless measurement on all quality surface areas, aluminium (mill finish and EDT) or steel (Z, ZE, ZF) each in EDT, EBT or Pretex texturing
- Acquisition of Wsa, Ra, RPc and Rz in one measurement recording, adjustable to traversing, movable measurement tracks (e.g. for strip centre, strip edges)
- Automatic adjustment to strip thickness
Informative
- Documentation of measurement data for waviness parameters and roughness parameters with image evidence over the length of the coil
- Microscopic image for the surface area structure
- Validation unit for inspecting the measuring system
- Versatile visualisation options for the WMS system
01
WMS Visualization
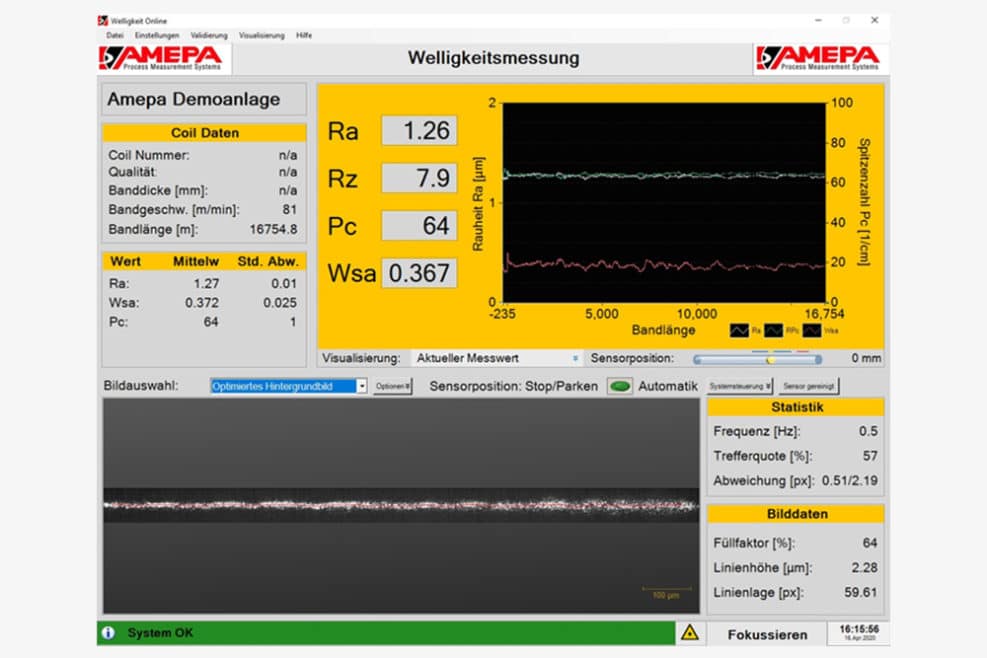
Visualization for the waviness measurement is structured in the same way as the roughness measurement. In addition to the waviness values for Wsa and Wa 0.8, the roughness values Ra, Rz, RPc, and other values can also be calculated and displayed. The WMS system provides versatile visualization options for the data.
The exemplary screenshot indicates the online Ra, Rz, RPc, and Wsa results over the coil length with the last microscopic image. Repeated warnings and alarm signals are displayed as soon as the waviness or roughness degree moves outside the tolerance determined for the customer-specific limits. The operator can immediately implement the necessary corrections without much loss of time.
02
Good Correlation of Measurements
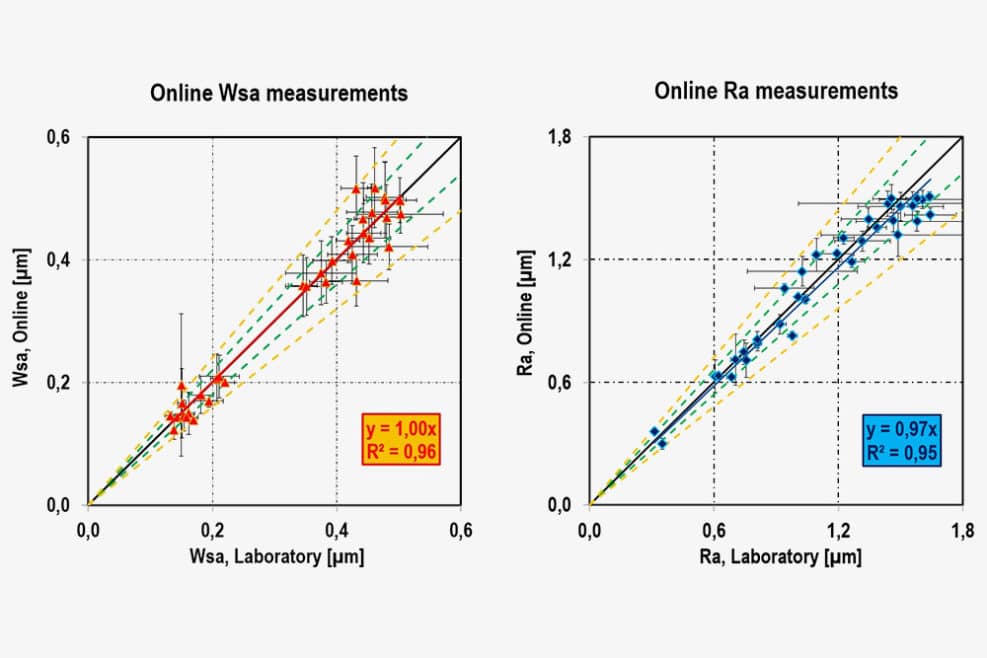
The good correlation of the determined parameters of the WMS waviness measuring system with values for waviness and roughness as measured in the laboratory is illustrated in the figures above.
03
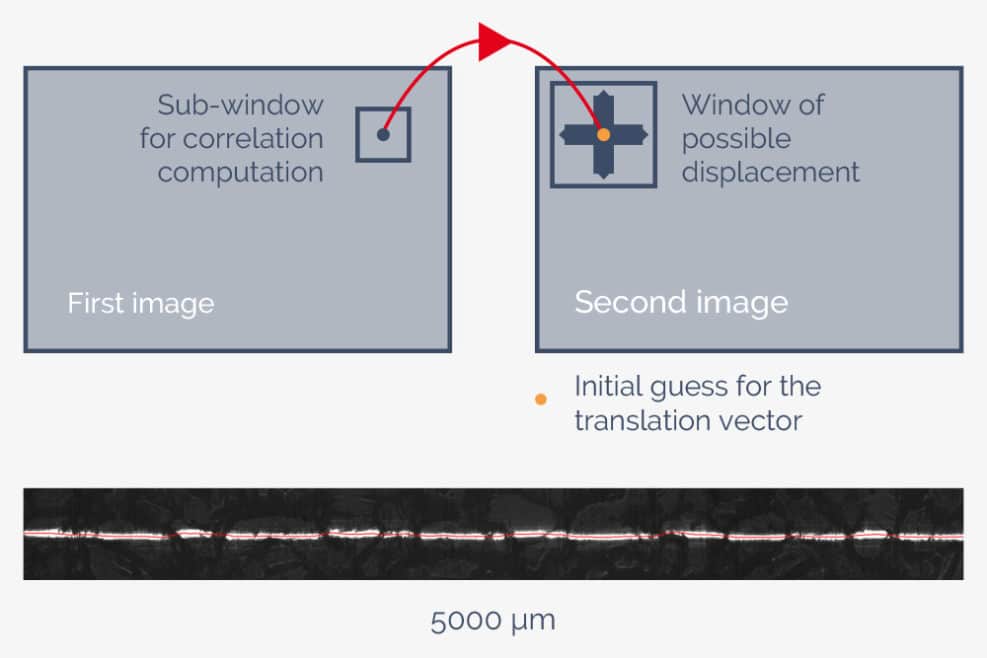
The Stitching Method
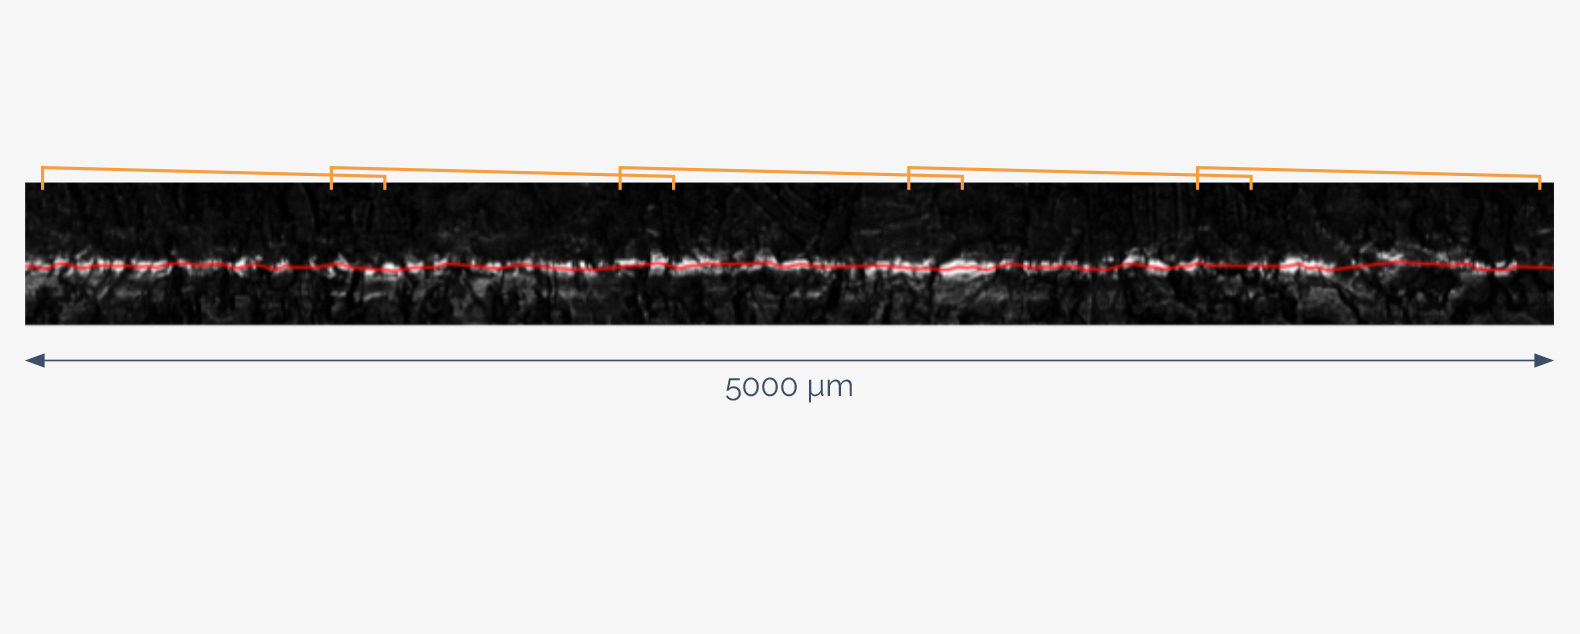
The individual microscopic images are taken in an overlapping manner to achieve the measuring length of 30 or 50 mm, which is required for the waviness measurement. The stitching algorithm determines the alignment and specifies the displacement of the individual images, so they can be combined to form a long image strip.
The laser line that is obtained and extends over all images can be detected and evaluated to determine the waviness and roughness parameters.
WMS Online Waviness Measurement
When the ripple on a steel sheet metal is located above the specified limits, the steel user will generally not accept the annealed and galvanized product for high value-added applications. Subsequent processing steps, especially painting, can lead to poor quality and product downgrading. This means that direct online measurement is always required in order to fully assess the surface area quality along the entire coil.
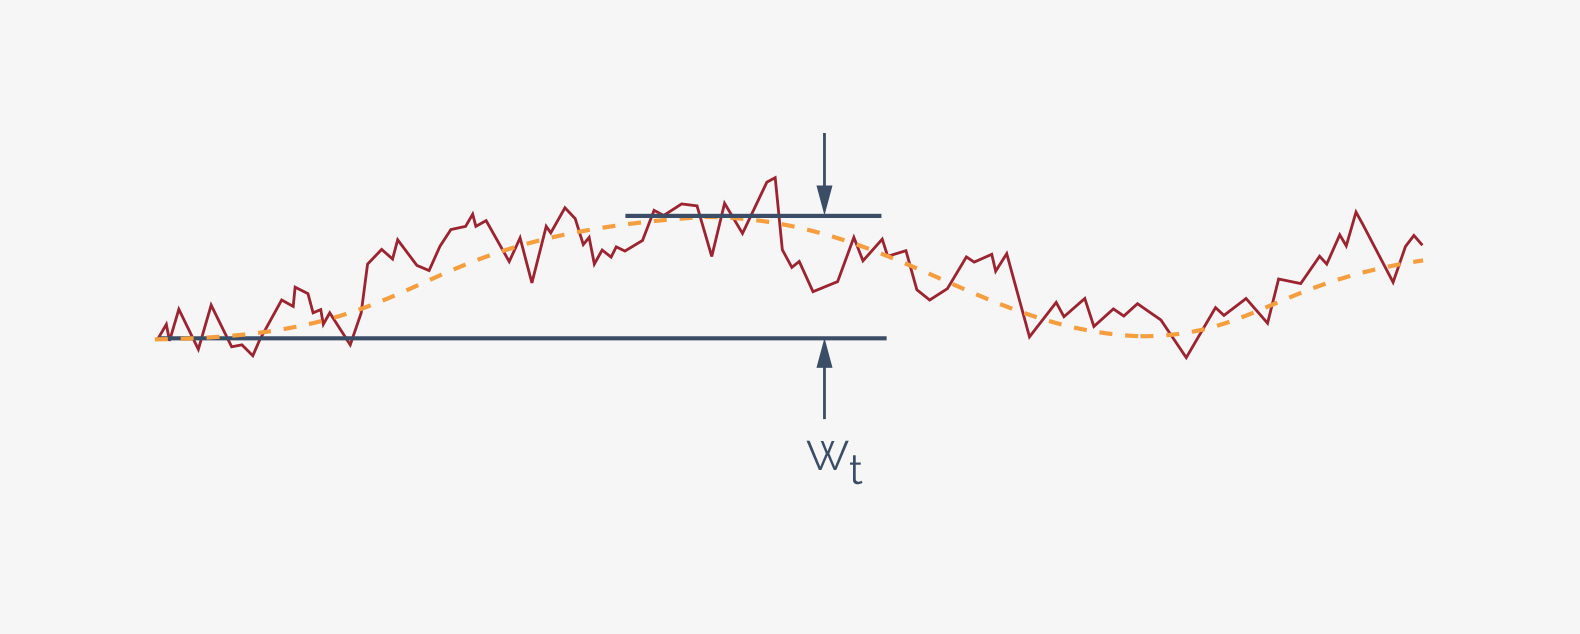
In principle, surface topography refers to the horizontal and vertical information regarding the height alteration of the surface area and can be divided into (micro-) roughness and rippling.
Unlike roughness, which in the case of steel only comprises the height variations with a horizontal spacing or a wavelength of up to 0.8 mm or 2.5 mm, rippling in steel refers to structural components with longer wavelengths. Rippling generally means the shape deviation of a surface area in the wavelength range above the roughness, which leads to clearly visible distortions in the reflection of a high-gloss painted surface.
The Waviness Measurement System is based on the SRM Surface Roughness Measurement System, which works based on a line projection – a two-dimensional laser triangulation method. The online roughness measurement and waviness measurement, based on this principle, was patented by the Centre for Research in Metallurgy (CRM, Liège).


