SRM
Online Roughness Measurement
Perfect Surface with Online Roughness Measurement
SRM 100
AMEPA online measurements of the surface area profile provide fundamental advantages for the customer:
- Visualize and document the roughness over the entire length of the coil or strip
- Efficiently detect roughness values outside the tolerance, which can be caused by
- Incoming roughness of the raw material
- Wear of work rollers
- Incorrect process parameters
- Provide online data to determine the optimal time to change the work rolls
- Provide the roughness value of Ra as an input for the process control
- Reduce the number of offline measurements with stylus instruments
Downloads
Your contact partner
Dipl.-Wirt.Ing. Ansgar Berlekamp
Technical Sales Manager
Dipl.-Ing. Jens Harre
Technical Sales Manager
The Benefits
Precise
- Measuring range of Ra 0.3 to 3 µm,
RPc 30 to 120 cm-1,
resolution for Ra with 0.01 µm - For automotive grades with high accuracy at ± 10 % for tactile measurement
- Measuring frequency up to 100 Hz, short response times, high dynamics
- Ra measurements with selectable cut-off of 0.8 or 2.5 mm
- View field of 1.2 х 0.4 mm,
measuring line of 1200 х 3.5 µm
(≈ spatial resolution like a stylus tip)
Efficient
- Insensitive to vibrations and strip oscillations, measurement capability up to 2000 m/minute and higher strip speed
- Reduction of time-consuming and sample-intensive stylus measurements, while maintaining the very high correlation with the stylus measurement
- Measuring is possible regardless of lighting conditions and also possible when the strip is stationary
Informative
- Documentation of measurement data of relevant roughness parameters with image evidence from the beginning to the end of the coil
- Microscopic image of the surface structure
- Validation unit for measurement integrity and measurement equipment capability studies
Versatile
- Non-contact measuring on all quality surface areas made of steel (Z, ZE, ZF, respectively EDT, EBT or PRETEX texturing) and aluminium (mill finish and EDT)
- Acquisition of Ra, RPc and Rz in one measurement recording, adjustable to traversing measurement tracks (e.g. for strip center, strip edges)
- Measuring angle at 90 degrees to the rolling direction (requirement from DIN EN ISO 10049), optionally with 45 degrees
01
SRM User Interface
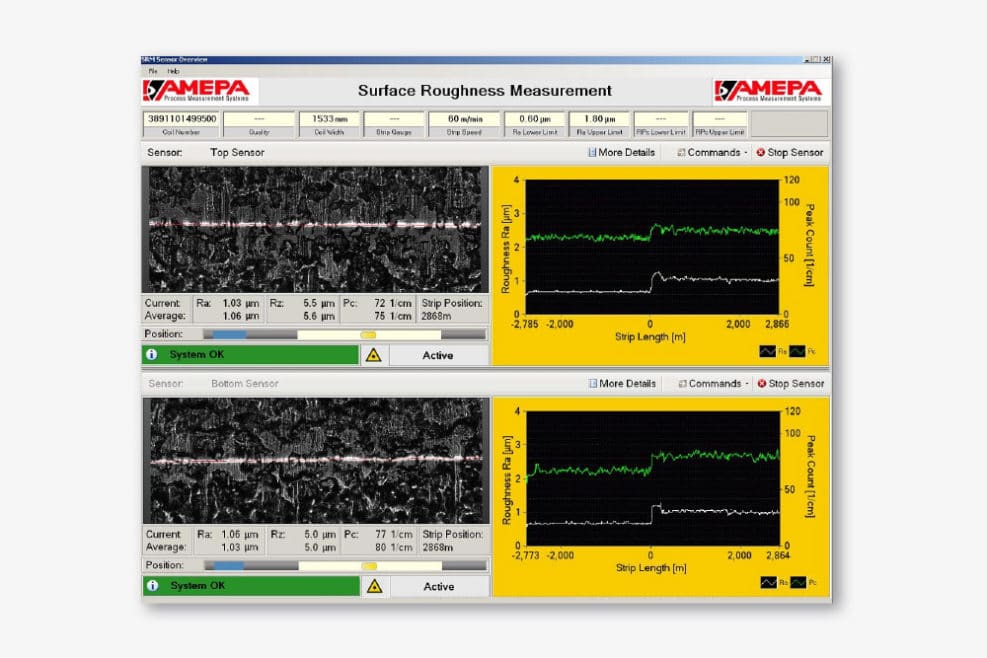
The laser line and the galvanised surface area texture (EDT in this case) are clearly visible. The example in the screenshot shows the on-line Ra and RPc results over the coil length with the most recent microscopic image. The high dynamics provided by the system enable the operator to rapidly correct the overshoot of the roughness during the coil exchange (in the middle of the diagram).
02
SRM – Tested and Proven
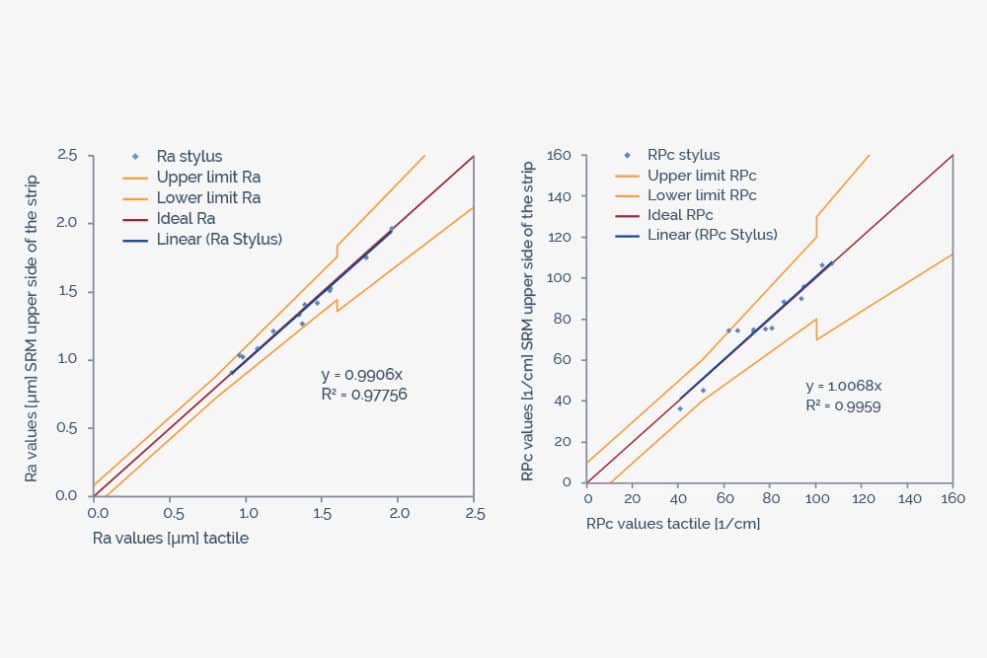
System tests comparing SRM results with conventional stylus measurements have clearly indicated the high reliability and accuracy of the system. In the example provided, the good correlation between the off-line stylus results and the on-line SRM results is easily visible.
03
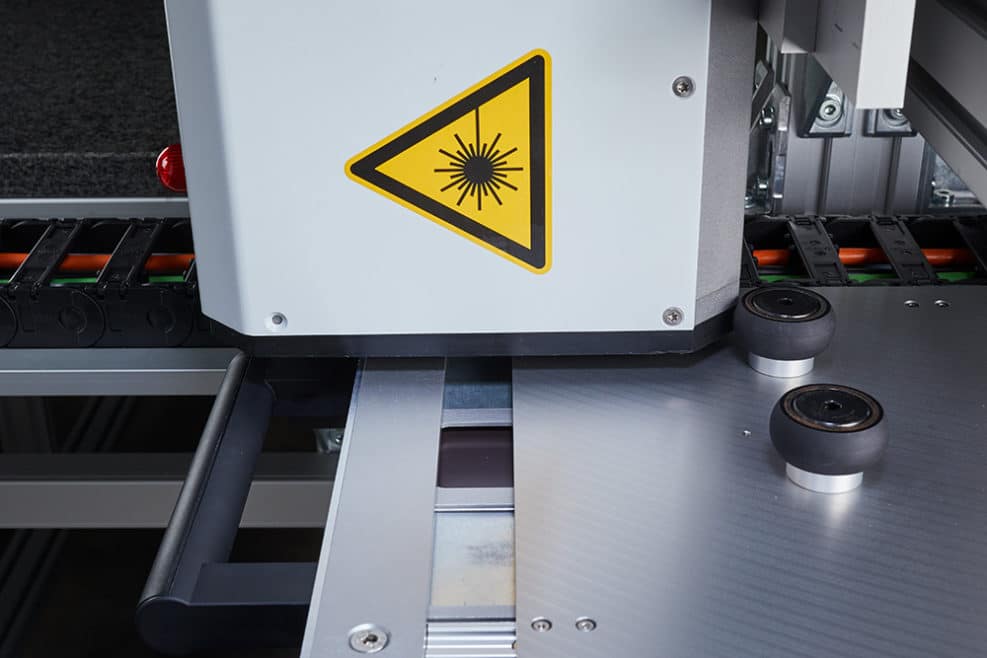
SRM Validation Unit
A validation measurement is an inspection of the sensor with regard to its optical characteristics and its proper operational functionality.
Automated validation measurements enable the sensor to be inspected during operation. This always ensures the process and documents a consistent quality of the measurement results.
Measuring Principle for Online Roughness Measuring
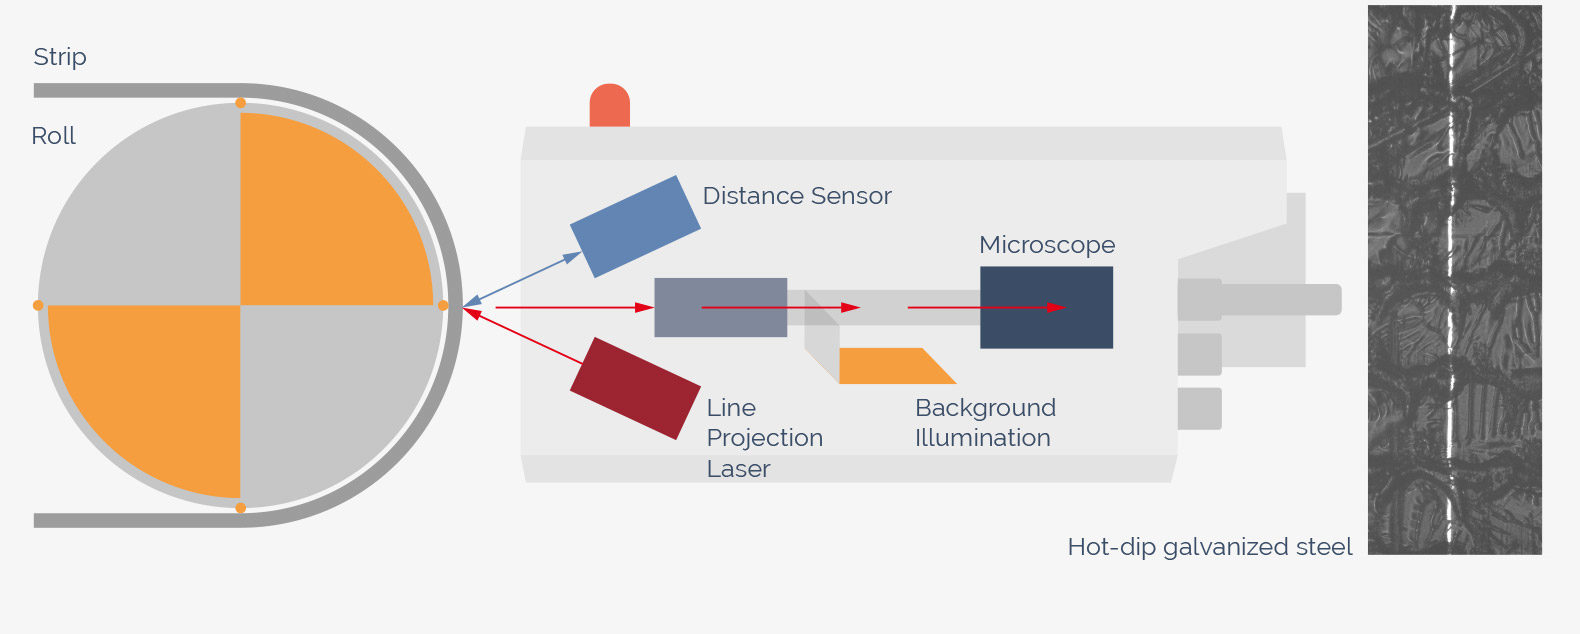
The SRM Surface Roughness Measurement System functions on the basis of line projection – a two-dimensional laser triangulation method which is patented by the Centre for Research in Metallurgy (CRM, Liège).
The laser line is projected onto the strip up to 100 times per second. The integrated CMOS camera subsequently makes a microscopic image of the laser line and the surface area structure. The clearly visible laser line is inspected for plausibility by utilizing intelligent image processing, filtered, and processed to calculate the roughness values. The measurements are combined in such a way that the conditions according to the DIN EN ISO 10049 standard are approximated. A reaction time of approx. 0.5 seconds to roughness alterations can be achieved when operating at 60 Hz and averaging over 30 measured values.
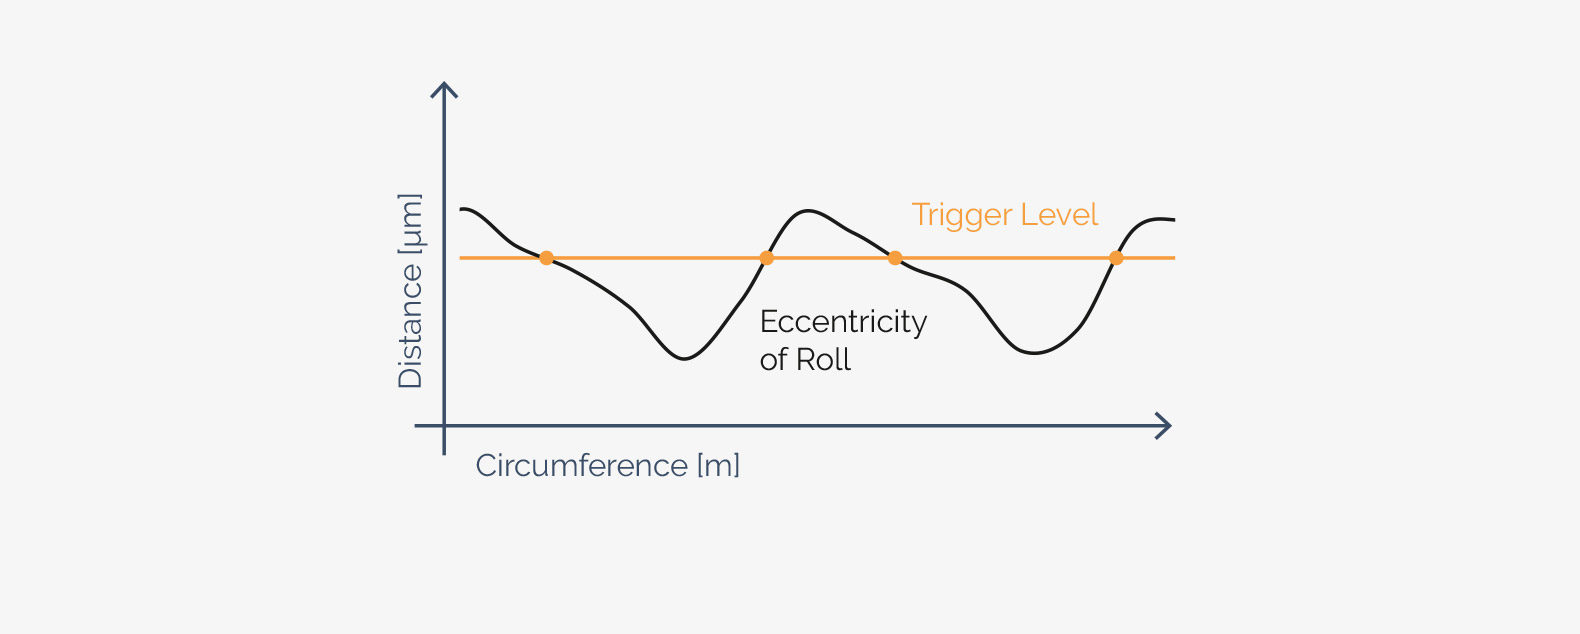
The distance sensor is positioned in the middle of the distance variations. It thereby triggers the measurement and image acquisition. This ensures that the focus for the optics is always at the correct distance. The sensor automatically compensates for varying strip thicknesses with its integrated drive units.


